Showing posts with label Today's Frugal Meal. Show all posts

Saturday, March 3, 2012

I Did It: Lasagna Soup

What a yummy soup! I freely admit to being a soup addict.  When I was pregnant with my son, now 5, soup was my only real craving.  Well, that and chili, which some might consider a soup anyway.  I sort of never got over that craving.  I love to eat soup, I love to make soup.  I find it supremely comforting.  If you ever hear from me that we are having soup for dinner, there is at least a 50% chance that something is bothering me or that I'm sick.  (About half the time I make soup, though, I make it just 'cuz I love it, not because I'm having some trial or another.)
I found this recipe for Lasagna Soup on Pinterest, and just couldn't stop thinking about it.  It's super simple to make.  I have made this soup a couple of times now, and have found ways to tweak it for my non-cheese-eating little ones.  Here's the recipe I follow, in its original form.

Lasagna Soup


2 tsp. olive oil
1 1/2 lb. Italian sausage
3 c. chopped onions
4 garlic cloves
2 tsp. dried oregano
1/2 tsp. crushed red pepper flakes
2 T. tomato paste
28 oz. can fire-roasted diced tomatoes
2 bay leaves
6 c. chicken stock
8 oz. mafalda or fusilli pasta
1/2 c. finely chopped fresh basil
salt/pepper to taste

for the cheesy gooey goodness:
8 oz. ricotta cheese
1/2 c. grated parmesan cheese
1/4 t. salt
freshly ground black pepper

2 c. shredded mozzarella

(Here's what I realized as I was shamelessly copying the ingredients from the other blog onto mine: I don't follow recipes very well any more.  It used to be that I would only ever make food by studiously following the recipe.  Like, obsessively.  I guess I've reached the point that I am confident enough in my kitchen to make substitutions.  Example: I haven't used 1 1/2 lbs. of Italian sausage to make anything.  Ever.  I use 1/2 lb. to make this recipe.   Maybe that's just the cheapskate in me.  I almost never have fresh basil in my house, so I use the dried stuff almost exclusively.  Chicken stock? Nah, I'll just use water and mix in a couple of beef boullion cubes. I don't remember the last time I had tomato paste.  Or fire-roasted diced tomatoes.  I just used a couple of jars of my own homemade spaghetti sauce, and I liked it just fine. I'm keeping the recipe in its original form here, though, to give respect to the person who came up with it.  Who obviously would be horrified in my kitchen.)

Heat olive oil in a large pot over medium heat. Add sausage, breaking up into bite sized pieces, and brown for about 5 minutes. Add onions and cook until softened, about 6 minutes. Add garlic, oregano, and red pepper flakes. Cook for 1 minute. Add tomato paste and stir well to incorporate. Cook for 3 to 4 minutes, or until the tomato paste turns a rusty brown color.

Add diced tomatoes, bay leaves, and chicken stock. Stir to combine. Bring to a boil and then reduce heat and simmer for 30 minutes. Add uncooked pasta and cook until al dente. Right before serving, stir in the basil and season to taste with salt and freshly ground black pepper.

While the pasta is cooking, prepare the cheesy gooey goodness. In a small bowl, combine the ricotta, Parmesan, salt, and pepper.
To serve, place a dollop of the cheesy gooey goodness in each soup bowl, sprinkle some of the mozzarella on top and ladle the hot soup over the cheese.

The recipe says this serves 8.  I think it's an easy recipe to stretch.  Just add more water and more boullion cubes. :)  If you know you want leftovers, cook the pasta separately and add it to the individual bowls.  That way you won't have soggy, mushy pasta in your leftovers.  You'll have to boil up some fresh pasta to have with your leftovers, but that will be 10 minutes well spent.  You really wouldn't want soggy, mushy pasta in your soup.  Don't ask me how I know this.

I served this with awesome breadsticks that I can't take any credit for at all, since I got the recipe from yet another food blog.  But that's a blog post for another day.


I Did It: Lemon Crinkle Cookies


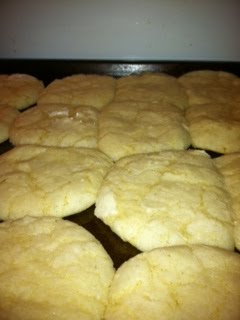
These cookies came together so easily! I got the recipe from Pinterest last night or this morning, and now I have cookies cooling on my stove!  The flavor is quite mild, but that's my own fault.  My lemons have been with me for a while, so they are soft and wouldn't zest.  Since I couldn't include the 2 tsp. lemon zest, I increased the lemon juice, hoping to keep the lemon flavor strong.  It didn't work; the lemon flavor is very, very faint.  They cookies are nicely sweet, though, thanks to the powdered sugar coating.  Another thing I didn't do was to line the cookie sheets with parchment.  I ran out, so I just used cooking spray.  I'm finding that the cookies are sticking to the pan a bit. 


1 ½ cup all-purpose flour
1/8 teaspoon baking soda
1/4 teaspoon baking powder
1/4 teaspoon salt
1/2 cup butter, softened
1 cup granulated sugar
1 large egg
1/2 teaspoon vanilla extract
1 tablespoon freshly squeezed lemon juice
2 teaspoons lemon zest
1/2 cup powdered sugar

Preheat the oven to 350.
Using a stand mixer, cream the butter and sugar, mixing for about 3 minutes.
Meanwhile, in a small bowl whisk together flour, baking powder, baking soda, and salt.
To the mixture in the stand mixer, add the egg, vanilla, lemon juice, and lemon zest.  Beat until combined. 
Add dry ingredients and mix until just combined.
Place powdered sugar in a small bowl.  Roll heaping tablespoons-ful in the sugar before placing them on a parchment-lined cookie sheet.
Bake for 12 minutes, turning the cookie sheet halfway through.
Cool for just a few minutes, then remove to a wire rack.
 
Makes about 2 dozen cookies.

Estimated Cost Breakdown:
Flour - $.05
Baking soda - $.02 
Baking powder - $.02
Salt - $0 (still using the big container of pink himalayan sea salt I got as a gift)
butter - $.99 
sugar - $.29
lemon juice and zest - $.50
vanilla - $.03
powdered sugar - $.16

Total cost for the batch: $2.06

Coming later today: Two more "I Did It" posts - breadsticks and lasagna soup


Saturday, February 25, 2012

I Did It: Pizza Snowballs


Thank you, pinterest! The recipe I found was almost embarrassingly easy, and I had all the ingredients to put them together in my pantry/freezer. Lunch was almost a no-brained!

The recipe called for refrigerator biscuits, which I did not have. I put together my favorite biscuit recipe instead, and the kiddos got to help with the pastry cutter. I did use sausage instead of pepperoni, as the recipe suggest, because that's what I had. They ended up being quite messy, and they didn't come together quite like the recipe shows. I ended up just dumping the cooked sausage into the biscuit dough, balling up wads of the mixture to put in the muffin tin, then sprinkling some cheese on the top.

The result? Big winner with my husband and myself, not so much with the kids. I served them with homemade spaghetti sauce dipping.

Monday, February 20, 2012

I Did It: Homemade Butter

I wish I had taken a picture of the little bit of butter the kids and I made! This makes a great and rewarding activity to do with the kiddos anytime.  I'll keep this in mind for those rainy days when things get a little squirrely around here.

I tried this recipe, on a much smaller scale, when I had a bit of heavy cream that had been hanging around in my fridge for a while.  I figured it was use it or lose it time, so why not give it a go? The kids and I enjoyed the shaking (and shaking and shaking and shaking), and the butter was actually quite good.  We sampled it the night we made it, then I used the rest in a batch of biscuites or scones or something.

Homemade Butter

organic cream (not ultra-pasteurized) (I used non-organic, and I have no idea about the pasteurization level!)
sea salt
quart or half gallon mason jars (I used a rubbermaid container, since I had just a tiny bit of cream.)

1. Leave the cream at room temperature for a few hours until it's fully warmed to room temperature.
2. Pour room temperature cream into jar.  Important: The jar should be double the size of the amount of cream you are using.  If you are shaking a pint of cream, you need a quart jar.
3. Make sure the cap the screwed on very tight (or the plastic lid is snapped tightly).  Shake it really really really well.  Take turns with each of the kids. You'll feel the progress soon.
4. Keep right on shaking until no more butter will form. (There will be a thin white liquid as well.)
5. Separate the liquid from the butter.
6. Place butter in a bowl and run very cold water over it.  Press and squeeze to get as much of the buttermilk out as you can.  Keep going until the water is clear.
7.  You can add salt if you want.
8. Pack in refrigerator or freezer proof containers.  I just kept the same rubbermaid I had used to make the butter.
9. You should be able to keep the butter, if frozen, for up to a year.

I Did It: Pao de Queijo


I already blogged about these rolls here (and the picture is actually better in the other post), but I made these this morning during a carb-crave.  I just wanted to say how easy these are!  I love that I don't have to wait for hours for a yeast bread to rise and I don't have to make the mess of biscuit or scone dough in order to get my carbs.  So easy, so fast, so flavorful. 
Check out my original post for the run-down on directions and cost.  See http://www.ourbestbites.com/ for the original recipe I used as well as for a plethora of other must-try's.

I Did It: Copy Cat Chili's Salsa


Don't you just love the salsa at Chili's? I do! I could make (and have made) a meal just from their chips and salsa.  Back when it was just $1.69 and $1.99.  Chips and salsa is still the cheapest appetizer on the menu, but the price just keeps going up.  I stumbled upon this recipe for a copy cat Chili's salsa on pinterest.  I browsed the blog it came from, and I was intrigued by more yummy-sounding recipes.  I've added several to my favorites, which is where I store all my new meal ideas for later use. 
I love this recipe because you buzz everything in a food processor until it's not very chunky at all - just the way I like it.  I suppose that, if you like a chunkier salsa, you could buzz it a little less and make it the consistency you like.
Over the weekend, I picked up a jumbo-giant can of diced tomatoes at Sam's Club for somewhere in the $2-$3 range, so I made 8 pints of this yummy salsa for basically what I would pay for one appetizer at the restaurant!
I tweaked about half of the ingredients in the following recipe.  I put my own comments in purple in the hope that you wouldn't be confused between the recipe and my comments.

Copy Cat Chili's Salsa

2 cans (14.5 oz each) whole tomatoes, drained (I used the jumbo can of diced tomatoes and kept the liquid)
1 small (4 oz.) can diced or whole jalapenos (not pickled) -- about 4 or 5 jalapenos (I used the type of jalapenos that are sliced long-ways.  I used about 4 or 5 SLICES, not 4 or 5 jalapenos.  We like things fairly mild here.  The salsa I made has just a tiny tiny hint of heat.)
1/4 c. yellow onion, cut into quarters (You can also used dried minced onion.) (I used yellow onion and onion powder.)
1 tsp. garlic salt (I used garlic powder.)
1/2 to 1 tsp. salt (depending on how much you prefer) (I probably used less than 1/2 tsp.)
1 tsp. cumin
1/2 tsp. sugar
1 tsp. lime juice (I might have used more.  I just juiced about 1/2 a lime into each batch I made.)

Place all of the ingredients together into a food processor or blender and puree until smooth.  Serve with tortilla chips.

What Has Happened to Me?

I don't know what has happened, but I have become very bad at posting blog updates.  I haven't been couponing like I should, so I don't have any super-savings-stories to share.  I've been so out of the drug store game that I actually let an ECB expire a couple of weeks ago.  What's wrong with me? I guess my adventures in becoming a cheapskate have served their purpose, and the blogging has lost its magic for me.  I have so much going on in my life that it doesn't make sense anymore to try to blog just about couponing.  A friend suggested that I start a cooking blog, and I guess I might use this blog for that purpose now.  I am still into saving money, to the point that I can figure the approximate, if not exact, cost of the recipes I make.  I've done that quite a bit here, in posts I call Today's Cheapskate Meal.  I think I just may focus, here on wannabe cheapskate, on that part of my life more than on others.  I'll be posting every time I try a new recipe, and I may backtrack a little to share some new favorites and flops.

Saturday, December 31, 2011

Today's Frugal Dinner: Baked Potato Soup

Beautiful Bacon.  Sizzling away, 8 slices of bacon comprise the first step of this lovely soup.  Yes, I only have 7 slices in the pan.  I only had 7 slices left in the pack and wasn't willing to thaw the package in the freezer just for one slice.  (Plus I like to think that using 7 slices instead of 8 is somewhat cheapskate-y of me.)

While the bacon sizzles (and 4 or 5 potatoes cook in the microwave for 12 minutes), melt the butter in a large stock pot (I used my big Rachael Ray pot.) then add garlic.  Mix in the flour.  Then SLOWLY add  milk, whisking to help eliminate lumps.  Next, add in some chicken stock and KEEP WHISKING.  You want the soup to be super smooth.  This is the most labor-intensive step of this soup.  Good news, though: once this step is done, your soup is almost done.  When the soup is nicely smooth and thickening, the potatoes should be finished and ready to move on to the next step.

Cut open the potatoes and scoop the insides into the soup.  (I LOVE that I don't have to peel the potatoes for this soup.) Mash the potatoes a bit with a wooden spoon.  Stir in some cheddar cheese, sour cream, green onions, and some of that yummy bacon.

To serve, ladle into bowls and garnish with more sour cream, green onions, cheddar, and bacon.  Or, if you are like my kids and have hang-ups about most of those items, just bacon.  (That reminds me, don't tell my Dianna that there is cheese in here.  She won't touch it if she knows, and she currently thinks I make "famous" potato soup.  I'd like to keep up the delusion that I'm a good cook.  And don't tell Jarod either, because he currently has a thing about "cooked" cheese.  If it's melty, he doesn't like it, apparently.  If we could just keep this between us, that would be great.  Thanks a heap.)

This recipe is amazing, and the girls at http://www.ourbestbites.com/ has certainly helped to make it not-so-bad-for-you.  I love their lower-fat twist to the soup.  I must admit that I used 2% milk not skim and I used full-fat sour cream instead of low-fat, because that's how I roll. (Really, I needed to buy a big container of sour cream to help make several recipes and the only big container was the regular version.)


8 slices of bacon, divided
4 or 5 potatoes (about 2 1/2 pounds)
2-3 cloves of garlic, minced
1/2 c. flour
4 1/2 c. milk
1 14 oz. can of chicken broth
2 c. grated cheddar (I used sharp.), divided
1 1/2 tsp. salt
1/2 tsp. black pepper
1 1/2 c. sour cream, divided
1/2 c. chopped green onions, divided

Cook 8 slices of bacon.  Crumble and set aside.
Wash the potatoes well, then poke them several times with a fork.  Microwave for 12 minutes, or until cooked through. (12 minutes is perfect in my microwave.)
In a large pot, melt the butter, then add the garlic.  Cook for several minutes, then add the flour, stirring well to combine.
Stir in the milk slowly, whisking constantly to make smooth.  Add the chicken broth and whisk until completely smooth.
Once the soup is smooth and beginning to thicken, turn the heat down.  Cut open the potatoes and use a spoon to scoop out the innards.  Use a wooden spoon to smash the potatoes a good bit. Add 1 1/2 c. cheese, 3/4 c. sour cream, 1/4 c. green onions, and 4 slices of crumbled bacon. 
That's it! The soup is ready to serve! Garnish with more cheese, sour cream, bacon, and green onions.

Let's talk price:
bacon - purchased at Sam's for $13.48 for 3 1/2 lbs. - $2.25
4-5 potatoes - purchased at Sam's for $3.98 for 10 lbs. - $1
2-3 cloves of garlic - purchased at Sam's for $4.72 for 48 oz. - $.10
1/2 c. flour - purchased at Sam's for $7.28 for 25 lbs. - $.05
4 1/2 c. milk - purchased at Sam's for $3.89 for 1 gal. - $1.09
14 oz. chicken broth - purchased at Publix on BOGO sale $2.59 for 2 (32 oz.) boxes - $.65
2 c. grated cheddar - purchased at Sam's for $3.98 for 2 lb. - $1.00
salt - $0.00
pepper - $.02 est.
1 1/2 c. sour cream - purchased at Publix for $2.59 for 24 oz. - $.86
green onions - purchased at Publix for $.60 for a bunch - $.08
Bread from the Publix bakery, because I just couldn't resist - $2.99
Tortilla chips - leftovers from lunch at Red Robin
Total cost for this meal: $10.09
We have enough leftovers to have a little snack tomorrow afternoon.  Or when up at 2:00 am with a hungry baby.  Plus there's enough bread for another 2 or 3 soup meals.

Tuesday, December 27, 2011

Tonight's Frugal Dinner - Talani's Famous Ham

This ham that Talani makes with leftovers is so ridiculously delicious that we gobbled it up before we could take a picture of it.  It may not be "famous" to the world, but we like it so much that it's definitely famous around our house. It's NOT a healthy meal, necessarily, but we like it anyway. 

Talani combines chopped up leftover spiral sliced ham (from Christmas dinner this time) with spicy brown mustard, brown sugar, and butter.  It just cooks until it's heated through and the sugar isn't grainy anymore.  Sometimes it's really saucy; tonight it was not.  Sometimes it's really sticky; tonight it was not.  It was wonderful.  We ate it with rice.  I had seconds.  And I don't regret it.  At all.

Talani's Famous Ham and Rice

about 2 c. leftover spiral-sliced glazed ham, chopped $3 (We bought our ham at $1.99/lb., and I'm estimating that we ate 1 1/2 lb.)
1 1/2 Tbsp. brown sugar $.05
3 Tbsp. spicy brown mustard $.23
2 Tbsp. butter $.16
2 c. rice $.25

Combine rice and 4 c. water.  Bring to a boil, then reduce heat.  Rice will be done in approximately 18 minutes.
Meanwhile, combine ham, sugar, mustard, and butter.  Simmer and sizzle until heated through and the sugar isn't grainy anymore.

Total cost: $3.69

Saturday, December 24, 2011

Today's Cheapskate DESSERT: Lime Meltaways

Oh my, I LOVE baking.  I can't believe it's taken me 34 years to figure out what a great hobby it is.  I always dreaded the clean up, I guess, and that kept me from trying too many things.  I have grasped the fact that clean up is part of the process, and that the process is captivating.  I get more relaxation from baking, I think, than even a nap.  (And I've always loved naps.) 
I've followed http://www.closetcooking.com/ on twitter for quite some time, enjoying the recipes, but feeling like they were out of my league.  I recently read the recipe for dark chocolate shortbread with fleur de sel, and I was intrigued.  I browsed his Kevin's blog a little bit and came across the recipe for lime meltaways.  WELL, if there's anything I'd like to snack on more than chocolate chunk cookies, it's lime cookies.  I have a special affinity for just about anything citrus.

I did make a couple of tweaks, but nothing major.  At least I hope it doesn't turn out to be major.  I'm only about half way done with the recipe as I type this portion of this post.

Lime Meltaways

1 1/2 sticks butter, at room temperature ($.94)
1/3 c. powdered sugar ($.12)
zest of 2 limes ($.67)
2 Tbsp. lime juice
1 Tbsp. vanilla extract (I used almond just because, and I was just shy of a tablespoon.) ($.21)
1 3/4 c. + 2 Tbsp. flour ($.30)
2 Tbsp. corn starch ($.05)
1/4 tsp. salt ($.00)
3/4 c. powdered sugar ($.27)

Total for the batch: $2.56
My batch made 3 dozen cookies.

Cream together butter and sugar.
Add lime zest and juice, vanilla (or almond) extract and beat well.
In a large bowl, mix flour, cornstarch, and salt.
Combine wet and dry ingredients.
Roll out the dough into a 1 1/4 inch log.
Wrap in plastic and chill in the refrigerator for at least an hour. (I used the freezer for 30 minutes.)
Slice the dough into 1/4 inch pieces and place on a baking sheet 1 inch apart.
Bake at 350 for 12-15 minutes.
Let cook on a wire rack for 4 minutes.
Dredge in powdered sugar to coat.

Lime Meltaways in the cut-into-slices phase.

**UPDATE: The cookies are done, and they are different than I expected.  They are drier than I thought.  I was expecting really buttery meltiness, not crumbly meltiness.  They taste good - tart and sweet at the same time.  I'm somewhat disappointed to be honest.  I wonder if the lack of vanilla extract was my mistake?  I had thought I'd also try making the dark chocolate shortbread cookies linked above, but now I'm not sure I want to.   Oh, well.  Really, I like them.  I do.  But I'm afraid no one else will.  And I think they might be messy with their crumbli-ness.

The first pan of Lime Meltaways as a finished product. 

Friday, December 23, 2011

Today's Cheapskate Meal: Tortellini Sausage Soup

Okay, so a food photographer I am not.  This is 1/2 pound bulk pork sausage cooking up as the first step to creating this amazing soup.  (Can I just say that, as I type this, the soup is about halfway finished, and my house already smells amazing.  I can't wait for lunch.)

Some other ingredients I needed: parsley, basil, tomato puree, minced garlic, oregano, apple cider vinegar, beef broth, carrots (mine are matchsticks), zucchini (I bought several on sale, grated them up, and froze them in individual sized bags just for this purpose.), diced onion.  On the left side, you can see a tiny corner of a cookie sheet.  That cookie sheet is filled with breadsticks from an http://www.ourbestbites.com/ recipe, and they go great with this soup.  On the right hand side, you can see my laptop with this recipe.  I wonder how many times I'll make this soup before I'll have it memorized.  I've made it at least a dozen times and I'd still be lost after the brown-the-sausage-and-add-onions-and-garlic phase.

Before I go any further, I need to give props to Kate and Sara at http://www.ourbestbites.com/.  Seriously, I don't know what my family did for food before I stumbled upon this blog in the spring.  About half of what I make comes from this blog!  I wait anxiously for each new post, and I'm constantly adding their recipes to my "try these tasty eats" folder on my favorites.

I rarely vary from a recipes ingredients or steps, because I'm terrified of messing things up.  I can say, though, that I make several tweeks to this soup and haven't had disastrous results.

Tortellini Sausage Soup

3 links Italian sausage (I use 1/2 lb. bulk sausage) $1.50
4 cloves minced garlic ($.12)
1 onion, diced (I use 1/2 an onion because I don't care for a lot of onion, and I get to make the call since I'm the one cooking!) $.25
1/2 c. water (I usually use double this, since I like to make the soup really stretch.) $0
2 cans chicken broth (I use beef.) $1.29 (BOGO)
1/2 c. apple cider (I use 1 - 1 1/2 Tbsp. apple cider vinegar.) $.10
1 16 oz. can diced tomato
1 8 oz. can tomato sauce (I use a 29 oz. can of tomato puree.  I don't like chunks of tomato.  Again, I get to make that kind of substitution cuz I'm the one cooking, and usually no one is the wiser.)  $1.89
1 c. sliced carrots ($.30)
1 tsp. dried basil ($.03)
1 tsp. dried oregano ($.03)
2 medium zucchini, grated (I use only about 1/2 of a zucchini.) $.50
8-10 oz. package frozen tortellini ($3.59)
2 Tbsp. dried parsley ($.18)

Total: $9.78.  That seems like a lot of money for one soup meal!  But it's oh-so-filling; I usually have leftovers for another meal or late night snack.  Plus, it's still MUCH cheaper than going out for a soup lunch at Olive Garden or Panera Bread.  I serve this with sprinkles of parmesan cheese and fresh breadsticks, which brings the total closer to $12 for the meal.  I'm okay with that, really.

Brown the sausage.  Drain fat if necessary. (I've never had enough to worry about draining.)
Add the onions and garlic, and cook just for a few minutes.
Add water, broth, cider or vinegar, tomatoes, carrots, basil, and oregano.  Simmer for 30 minutes.
Add zucchini and parsley.  Simmer for 15 minutes.
Add tortellini.  Simmer for about 10 minutes.
(I usually divide my soup into two parts before adding the pasta.  The grownups like tortellini, but the kids don't care for the cheese.  I take a portion of the soup, put it in another pot, and add some kind of fun little pasta shape (today it's wheels), and cook for 7 minutes. That way, they get what they like, and it's more tortellini for me!)


Wednesday, December 21, 2011

Today's Cheapskate Meal: Chipotle Pork Tacos

The sliced pork loin marinates briefly in a mixture of lime zest, lime juice, oregano, chipotle in adobo (sauce only), salt, and garlic.

I cooked up some sliced white onion then removed them from the pan.  The sliced pork loin cooks super quickly, then the onions rejoin it in the pan. 
I'm serving it on rice instead of in tortillas.  Rice is soooo much cheaper than a pack of tortillas.  I gave a thought to trying to make tortillas myself today, but I didn't think seriously enough about it to actually work up the effort it would take.  Maybe next time.  These tacos are on the menu again next week, so maybe I'll give it a shot then.  This stay-at-home vacation is the perfect time to try making tortillas.  Maybe you'll see a "cheapskate meal" post in the next week or so all about homemade tortillas.  If you don't, you can assume that either I didn't try to make them or that I did and they totally flopped!

See the original recipe for this delicious meal from ourbestbites here.

Here's the breakdown of what we had tonight:

Chipotle Pork Tacos

1 lb. pork loin or chops, sliced thin ($2.00)
zest and juice of one lime ($.33)
1/2 tsp. dry oregano ($.03)
1 tsp. brown sugar ($.03)
chipotle in adobo ($.18)**
2 tsp. minced garlic ($.15)
1/4 tsp. salt ($.00)
3 tsp. olive oil ($.08)
1 c. chopped onion ($.21)
2 c. rice ($.17)***
sour cream ($.50)
Shredded cheese ($1)

Total cost: $4.18, plus the cost of tomatoes and ranch served alongside.  So, maybe around $6?

**I used just about 1 Tbsp. of sauce from the can of chipotle in adobo.  Our family doesn't want much heat at all, so I go easy on it.  The original recipe calls for 2 tsp - 1 1/2 Tbsp, depending on the amount of heat desired.  The peppers themselves contain more heat than the sauce.
***The original recipe calls for corn tortillas.  I saved at least $2 by substituting rice.

In a bowl, combine the pork, lime juice and zest, oregano, garlic, salt, and chipotle in adobo.  Set aside. 
Saute chopped onions in a bit of olive oil, about 4 minutes.  Set aside.
Add a little more oil to the pan, then saute the pork until no longer pink, about 4 minutes. (See, the recipe goes together QUICKLY!)
Add onions to the pork and allow to cook together and get all happy.
Serve on tortillas (or rice) with sour cream and chopped cilantro. 
I like to add shredded cheese to mine.  Salsa isn't necessary and would be insulting to the spicy pork, I think. 
Shredded lettuce, diced tomato, diced avocado, etc., wouldn't be amiss, either but would add to the price bottom line.

Tuesday, December 20, 2011

Today's Cheapskate Meal: Dinner Rolls

Dinner rolls during the first rise.

Uniform dinner rolls during the second rise.  The recipe made 80 rolls weighing an average of 25 grams each.


Dinner rolls just after they came out of the oven.  They're beautiful.

This recipe comes from the website http://www.onceamonthmom.com/.  It is designed to be frozen part of the way through the procedure then thawed at some later date.  The batch makes so many that you could totally do that. I could easily see making sets of 20 of these little beauties.  However, I don't have the number of smaller baking dishes needed to freeze these.  Plus, now I have plenty of excuse to eat delicious carbs over the next couple of days.
These rolls have a slightly pretzel-y flavor that I can't explain.  If I were more like Alton Brown I might know why they have that distinct taste.  Since I'm not more like Alton Brown, I'll just remain ignorant and enjoy the pretzel-y-ness. 
These rolls have very normal rise times.  Being slow in the kitchen, though, I - of course - have to find a way to make them take longer than necessary.  I'm obsessive about uniform rolls so I weigh them out on my digital scale to get them to weigh the same.  I weighed in grams and made rolls that were 24-27 grams each.  I ended up with one roll that was 36 grams.  I made two 18 gram rolls out of it and didn't notice a bit of difference when we ate them tonight.
  I made this recipe at Thanksgiving and it was the one failure of the day.  I think I made them too large, and that caused them to not cook through in the middle.  These smaller rolls, though, were perfectly done.
I am planning to make potato soup for lunch tomorrow, and these will go great alongside.

Dinner Rolls

2 cups warm milk  $.47
1/2 c. melted butter $.63
1/2 c. sugar $.17
2 1/4 tsp. yeast $.12
4 1/2 c. flour $.16
1/2 tsp. baking powder $.03
1 tsp. baking soda $.03
1/2 tsp. salt $.00

Combine warm milk, melted butter, and sugar.  Stir until the sugar is dissolve, then add the yeast.  Let stand for 10 minutes.  The yeast should be bubbly.  (I assemble my bread doughs a little differently.  I add the yeast to the milk and butter and let stand for 10 minutes.  Then I add the sugar and stir until dissoved.) 
In a large bowl, combine flour, baking powder, baking soda, and salt.  Pour the milk/butter/sugar/yeast mixture over the dry ingredients.  Mix very well.
Place bowl in a warm place, cover, and let rise for about an hour.
After the rise is complete, punch down, and divide into two sections.  Roll dough into golf-ball sized rolls and place in a greased 9x13 pan. (I used a 9x13 and a 9x9. I also didn't divide the dough into two sections; I just weighed it out.)  Cover and allow to rise until double. 
About half way through the rise, preheat the oven to 350 degrees.  Bake the rolls for 12-15 minutes. (I started at 12, then reset the timer for another 3 minutes when they were still very raw looking.  After that 3 minutes, they still didn't look quite done, so I let them go another 3 minutes.  That gives me a total of 18 minutes.)
Upon removing rolls from the oven, rub with cold butter.  (I also like to sprinkle them with a tiny bit of salt.)
Enjoy as soon as you can touch them without blistering your fingers.

The total cost of these rolls is $1.61.  These will last several meals.

Today's Frugal Meal: Caldereta with Pork

Either my camera is on a weird setting or my kitchen lighting is funky.  I promise this dish is not so completely orange. 
Last Christmas, one of my students and her parents prepared a Filipino meal for us as a Christmas gift.  It was incredible.  They made us lumpia; we love lumpia.  And they made us caldereta.  I'd never had caldereta before.  I'd never HEARD of caldereta before.  We loved it! So much so, as a matter of fact, that I asked the mom of that student to share the recipe.  Today is the second time I have made this dish.  The first time I tried it, it was a hit, which is a good thing since I was being very daring and cooking it when we were having company. 
The recipe calls for mixed vegetables to be added in, but I just didn't want to. 
Tonight I made linguine noodles to serve under the stew.  I also made some rolls which will show up in another post, probably later this evening.

Pork Caldereta

2 lb. pork loin, diced ( I used just 1 pound for our family.) $2.00
1 Tbsp. olive oil $.10
4 cups of water, divided $.00
1 pkg. Mama Sita's caldereta mix, available at Asian food stores (I used only half the packet for our little family.  I didn't want the stew to be too spicy, and I wanted to minimize the amount of MSG I used.) $.60
3-4 medium potatoes $.99
2 c. frozen vegetables (peas, mixed veggies, etc.) $.99
1 Tbsp. cornstarch $.10

In a large skillet, brown diced pork in olive oil.  When browned, add 2 cups of water and caldereta mix.  Bring to light boil, then allow to simmer for several minutes.
Meanwhile, peel and dice potatoes.  Add potatoes and vegetables to the pork. (I added an extra cup of water at this point.  I didn't feel like I had enough to cook the potatoes through.)  Allow to cook until the potatoes are tender.  (I let it go 10 minutes.) 
Mix cornstarch with 2 cups of cold water.  Pour into pork and potato mixture.  Bring back to a boil for a minute, then reduce heat and let simmer.  (The whole cornstarch and extra water step is optional but is very appropriate to dilute the spicyness of the dish.  Even with using only half the caldereta mix, I still did this step.)
Serve with rice or noodles.
The total cost for this meal is $5.18, including the cost of half a box of linguine.  I only spent $4.19 since I left the veggies out tonight.  Add to that the cost of the dinner rolls I made ($1.61 for the whole batch; we used 1/3 of that batch, or $.54 worth.), and tonight's dinner cost us $4.73.

Today's Cheapskate Meal: Black Bean Tomato Soup

That's right, just two measly slices of bacon.  You'll be able to taste it in every bite.

Hmm.  Kinda doesn't look so good at this point.  I'm telling you, though, less than 15 minutes after this moment: bliss in the form of creamy black beany soup.

I've stumbled upon a new-to-me cooking blog - http://www.deliciousmeliscious.com/ - and have saved about half of her recipes to my favorites.  I've got a long list of new recipes to try.  It will easily take me into the spring to try all of the dishes that appeal to me.  I've tried two recipes already: mongolian beef, which was a HUGE hit at our house, and this black bean tomato soup.  The kids weren't a big fan of the soup, but they don't seem to care for black beans much. (crazy kids)  My husband is very easy to please, but he did make some happy sounds as he ate the soup.  (maybe he tasted the bacon)
I'm pathetically slow in the kitchen - although I really do think I'm getting faster the more I cook - but this recipe didn't take too long at all.  In fact, I made this soup, pao de queijo, rice, and moroccan beef (in case the soup didn't go over well) all at the same time.  I wish I had one of those fancy blenders, like a vitamix or a ninja.  Oh, well, my old food processor did the job well enough, even though I did wonder if the soup could be even smoother. 

Black Bean Tomato Soup

2 center-cut bacon slices (I used the thick slices I like so much.)
1/2 c. chopped onion
1/4 c. chopped celery (I left this out since I didn't have any celery.  I didn't miss it.)
1 tsp. cumin
1/2 tsp. chili powder
1 garlic clove, minced
1/4 tsp. freshly ground black pepper
1 (15 oz.) can black beans, rinsed
1 (14.5 oz) organic no-salt-added diced tomatoes (I used the non-organic, salty, whole stewed tomatoes because that's what I had on hand.  Since everything was pureed in the food processor, I don't figure it made a whole lot of difference.)
1 (14 oz.) can chicken broth

Cook up the two slices of bacon then remove it from the pan.  Allow it to cool, then crumble it and set aside.  Drain some fat, if necessary, so that there is just a trace left.  (I didn't have to drain at all.)  Add in the chopped onion and celery.  Cook for 5 minutes or until the celery is cooked through.  Stir in cumin, chili powder, garlic, and pepper; cook for 1 minute.  Add in beans, tomatoes, broth, and crumbled bacon.  Bring to a boil, then lower the temperature and allow to simmer for about 10 minutes.  Ladle half the soup into the bowl of your food processor or the carafe of your fancy blender.  Process or blend until smooth, leaving the lid open but covered with a cloth to let steam escape.  Remove blended soup to a bowl and repeat process with the rest of the soup. 
Serve soup with sour cream.  (The recipe on deliciousmeliscious gives guidelines for making a lime-cilantro cream.  My hubby doesn't care at all for cilantro, so I didn't bother with this.)
I served it over rice, with the sour cream and a tiny sprinkle of cheddar cheese.  It was really good, fairly healthy (would be more so without the bacon, but I couldn't do without the bacon!), and filling. 
I'll definitely make it again.  Two successful meals from this blog make it a winner in my book, and I can't wait to try another recipe!


Monday, December 19, 2011

Today's Cheapskate Meal: Pao de Queijo

Oh, these rolls!  They're AmAzInG!  They really aren't cheapskate-y, except for the fact that they are part of a meal that is oh-so-much-cheaper than eating at a restaurant.  I made these rolls to go alongside creamy black bean tomato soup.  The un-cheapskate-y part of them is the tapioca flour.  I paid $5.50 for a bag that will only make about 4 batches. 
Once again, I called upon a recipe from my favorite cooking blog, http://www.ourbestbites.com/.  I have wanted to make these rolls for, like, infinity, but couldn't because I couldn't find the tapioca flour that is a must-have.  I finally stumbled upon it this morning, so I couldn't let the day go by without giving them a try.  Sara of ourbestbites suggests sprinkling rosemary on top.  I put a pinch of dried rosemary into the batter instead.  Other than that, I pretty much did exactly what the recipe said to do.  Oh, with one more exception: I used mild cheddar instead of sharp because that's what I have.
For Sara's great backstory and lots more fabulous recipes, be sure to check out http://www.ourbestbites.com/.

Pao de Queijo

1 large egg $.16
1/2 c. milk $.12
1/4 c. oil $.06
1 c. tapioca flour  $1.38
1/2 tsp. salt $0
1/4 c. cheddar cheese  $.22
1/4 c. parmesan cheese $.12

Preheat oven to 400 degrees.
Put egg, milk, oil, flour, and salt into your blender or food processor.  Blend until smooth.
Add cheeses and pulse a couple of times until combined.  (This is when I added the rosemary, too.)
Pour into greased muffin tins, filling 3/4 full or a little less. (Sara says this gets her 16-20 muffins.  I only got 9.  Maybe she uses mini muffin tins?)  Sprinkle with a little extra parmesan and/or salt.  Bake at 400 for 15-20 minutes. (15 was perfect for me.) Try one as soon as it's cool enough to handle, and serve the rest while they're still warm.  (They don't reheat well, according to Sara, so don't waste time with this!)
Total cost for this side dish: $2.06, or $.23 per roll.

Today's Frugal Meal: Homemade Barbeque Pizza

This picture does not do this pizza justice.  It's HUGE.  It's delicious.  It's saucy and cheesy.  I'm getting hungry all over again just looking at the picture!
I used a wonderful dough recipe, one I regularly use for pizza dough as well as for breadsticks.  I topped the beautiful pizza with a tub of barbeque pork in sauce and a couple of handsful of shredded mozzarella cheese.  I baked the crust for about 10 minutes, added the toppings, then baked again for 10 or so minutes.  I turned on the broiler for about half a minute to try to get the cheese a bit crispy, but it didn't work like I had hoped.  I must have just not let it go long enough in my fear that it would burn. 
The key to this amazing pizza is the crust.  I use the recipe and method I learned on http://www.ourbestbites.com/.  I rarely ever deviate from this recipe at all, with one exception that I'll mention in the recipe directions below.

Pizza Crust (Or Breadsticks)
from http://www.ourbestbites.com/

1 1/2 c. warm water
1 Tbsp. sugar
1 Tbsp. yeast
1/2 tsp. salt
3-4 1/2 c. flour

In a large bowl, combine the water, sugar, and yeast. Allow to bloom for about 10 minutes.  (Here's what I do differently: I only combine the water and yeast.  After the 10 minutes, I stir the sugar in.) 
Stir in the salt.
Add in 2 cups of flour and stir until well combined.  Then add flour little by little (up to a total of 4 1/2 c.) until the dough is soft and elastic. 
Spray a bowl with non-stick cooking spray, put dough in the bowl, and cover with a damp towel.  Allow to rise for about 45 minutes. 
Punch down and roll into a circle.  (For last night's pizza, I put the whole dough into the cast iron skillet and pressed it out.  Next time, I will only use half the dough because it got realllllllly big.) Drizzle with olive oil and sprinkle with garlic powder and salt.  Use a pastry brush to spread seasoned oil all the way to the edge.  Prick with a fork several times.  Allow to rise for a few minutes, while the oven preheats to 425.
Bake at 425 for about 10 minutes.  Remove from oven and top.  Return to oven for another 10-12 minutes.
Enjoy the giantness that is your pizza.

Friday, November 4, 2011

Today's Frugal Meal: Three from One

Not gonna lie: The past few weeks have been extremely tough financially.  And it's not going to be easier this month.  So, I am trying to be really, REALLY careful with menu planning.  I have been browsing my favorite cooking blogs and exploring new ones to find recipes I can complete with the items I already have on hand or that I can make with only minimum additional ingredients to purchase.  I am learning to repurpose (I don't know if that's the right word for it.) ingredients I have on hand in order to make a meal.  One recent example was the package of ground pork I've had in the freezer for a month or more now.  I bought it with the intent of making the best meatloaf I've ever had.  (Seriously, those ourbestbites girls have it TOGETHER!)  Some of the ingredients, though, can be pretty expensive: bacon (I don't mind the high cost of bacon, since I just LOVE it so much.  I think I probably bought it and then used it for something else.) and chili sauce.  I need to figure out how to make my own chili sauce.  Or just find it on sale.  I NEVER see coupons for chili sauce, and I don't remember it ever being on sale.  It pains me to pay full price!  Anyway, I never made the meatloaf, and now I'm trying not to buy those expensive ingredients.  So, how to use the ground pork?  I was able to stretch that one package of ground pork into three separate meals.  I wish I had taken pictures of the dishes, but alas . . . I didn't.  You can check out the links to the recipes below, though, to get an idea of how they looked. 

Meal 1 - Sausage Tortellini Soup
This is another ourbestbites masterpiece.  I really tweeked it this time, though.  I used ground pork instead of sausage; I seasoned it up as close as I could come to match the flavors of that italian sausage.  I also used a plain pasta instead of cheese tortellini because I only had a tiny bit of tortellini left.  I had to leave the carrots and onions out, since I didn't have any.  (I did use onion powder to give the flavor of the onion.) Truth be told, this soup was delicious as served.  We didn't miss the missing ingredients or find it lacking at all.  We ate almost the entire giant pot, just the four of us.  After I cooked up the pork, I set half of it aside, so that I could make . . .

Meal 2 - Notsagna Pasta Toss
I could eat this meal every week.  Rachael Ray has taught me to love ricotta.  I could seriously eat the pasta with the ricotta, parmesan, and starchy water without the meaty sauce.  Yum.  I love it when I get bites that have extra of that creamy cheese.  I didn't have to tweek this recipe that much, except to replace the onion with onion powder.  I don't cook with wine, so I always leave that out.  I usually use a bit extra stock to make up for the missing liquid.  Oh, and I used beef broth instead of chicken . . . I think the recipe calls for chicken broth.  My biggest tweek was to use the rest of the ground pork instead of ground beef.  I love this meal.  If I ever have opportunity to make you a dinner, don't be surprised if it's this lasagna-like feast.  When I made the tomato sauce, I added a bit of extra stock to stretch the sauce and went a little bit shy on adding it to the creamy cheesy pasta.  I knew I wanted a good bit of meaty sauce left so I could make . . .

Meal 3 - (Semi-) Homemade Pizza
I enjoy making pizza crust from scratch using this ourbestbites recipe, but this particular night I needed to be fast so I ended up using a refrigerated pizza dough from the Publix bakery. ($2.59 -- ouch! I think I could make 3 batches for that price.)  I used a bit of plain tomato sauce plus the meaty tomato sauce from the previous meal along with shredded mozzarella for the toppings.  The pizza was delicious, and I only missed my homemade pizza crust because the store bought one ended up being MUCH thinner than the crust I make. 

All that from one 2-pound package of ground pork.  I think I spent around $5 for that meat, so that averages out to $1.67 per meal.  These three meals average out at about $4 each.  We feasted! We didn't feel like we were being cheapskates, that's for sure.  I'll just keep that little bit of information to myself.

Saturday, August 20, 2011

Saturday's snack - homemade pretzels

Let's see if I can come up with a close approximation of the cost of this yummy treat:

1 1/3 c water - free!
2 T butter - $.25
1 1/2 T sugar - $.04
3/4 t salt - free! (Still using the giant vat of salt I received as a gift)
4 c flour - $1.42
2 1/2 t yeast - $.17
1 1/2 T baking soda - $.03???
Plus more water for simmering.  Plus more salt to sprinkle on top.  Both free.
I did rub the tops with butter after they came out of the oven, but I didn't use more than a teaspoon.  Maybe half that.  So let's say $.05?

Total for 15 delicious pretzels - $1.96!

I'm thinking about making these for my class as a treat for getting through the first week of school.  I'll have to figure out how to make them tomorrow but save them until Friday.  Not sure how that's going to work.  Or if I'll manage to keep my hands off of them that long!  I'll have to make two batches to get everyone.  I am thinking of making them a bit smaller/skinnier.  That will give me enough to give to my team teacher(s) and assistant and principal, too.  I think that will help them hold their shape better, too.  They puffed up so much - in rising, simmering, and baking - that many of them lost their pretzel-shape, as you can tell in the picture.

Monday, August 8, 2011

Today's Frugal Meal - Scones!


This delicious batch of scones cost less than $2 to make!  That is the cost without coupons.  They are delicious -- Talani ate 3 for breakfast!  We ate them plain, with no butter or jam or anything at all.  I don't want to add to them; they are just right. 
I still can't believe that I made them myself.
They are shockingly easy.  The hardest part was cutting in the butter to the flour mixture.  You're supposed to use a pastry cutter or pastry blender (what's that thing called?), but I don't have one so I used a fork.  I wasn't sure if I was doing an adequate job of combining the flour mixture and the butter, but I must have.  They turned out so so so great. 
I definitely feel like a success in the kitchen this morning.  (I needed that.  Last night was ROUGH!)

In a somewhat-related note, I started a new blog dedicated to cooking frugally.  I've posted more detail about making these scones, although I didn't post any pictures.  (I have to figure out the whole picture on the phone sent to the blog thing again and set it up for the new blog.)  I didn't know I was going to start a new blog when I made the scones, or I would have taken more pictures along the way. :)  Anyway, feel free to go on over to the new spot and let me know what you think.  I posted the detailed cost breakdown there.